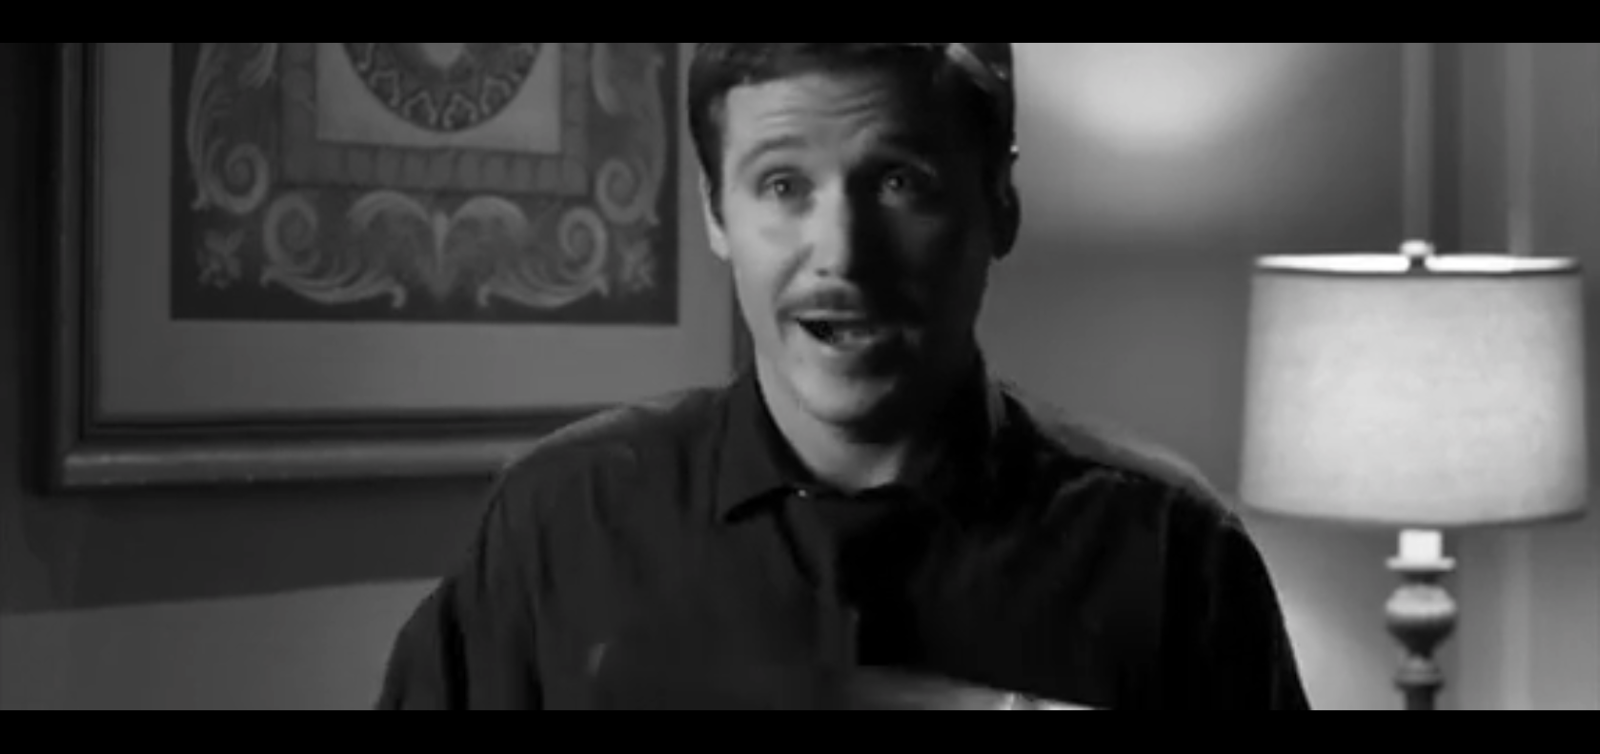
Hotel Noir, released in 2012, uses this style for its titles and trailer. It contains two staple motifs of film noir, smoke and monochrome. However, the use of a sans serif block font is a fairly recent convention. It is seen in several modern film noir movies, perhaps in an attempt to appeal to action fans, as this style (block font with metallic effects) is used mostly in gritty action movies. This can be seen here and in Gangster Squad's promotional material.
However, looking at older, more traditional film noir movies, one can see that this was not always the case. In these examples, some other styles are used.
This example uses a slanted, striped font. Striped fonts were common and most likely used to resemble the neon signs of the time in which these movies were set, the stripe being the space between the neon tubes. It is an interesting effect, one that would be easy to do, but an effective minimalist representation of a neon sign. It can also be interpreted as an art deco style.
This one is interesting for its use of a delicate cursive font for one word and a blocky serif font. They are a stark contrast to each other, making the title stand out.
I downloaded some free to use music to add into our opening. I felt that jazz music would be the most appropriate considering our genre is film noir and this is common convention for the genre.
I dragged the audio from the downloads in to final cut pro. I used the blade tool to cut it at the same time the tape recording started so that I could adjust the volume of that section independent to the rest of it. I reduced the volume so that the voice over could be heard more clearly along with the tape recorder's clicks and whirring. I felt that this music did not fit the second part of the opening where the detective was getting ready to meet the kidnapper, so I had it cut off at the same time the tape recording ended, which additionally created more tension and had a nice dramatic effect.
I think this music was the most fitting I could find and is adequate for the first part, but we need something more tense for the second part.
I added a glow effect to when the detective lights his cigarette, more specifically, I darkened the rest of the clip, as in my deconstructions, I found lighting was very dramatic. I also felt like it emphasised the sound of the lighter lighting.
I started by copying the clip on to a new layer above the current one. It lined up exactly and was completely identical. This was within the nested clip which had the black and white filter over it, so it appears in colour in the previews. I adjusted the lighting of the clip underneath to be darker using the colour correction and exposure levels.
I then applied a vignette mask to the clip on the top, and moved its centre to be over the cigarette lighter. I then adjusted the falloff and size until I thought it fit, and it was complete. I did ideally want to apply this effect to many clips within the opening, but when I tried, the preview rendering dropped to unbearably slow speeds, making it impractical.
I like how this effect looks, but I think it makes too much of the frame too dark, so if I were to do it again I would lighten the top clip instead of darkening the bottom clip.
We have completed the first draft of our film opening and received feedback on it. Overall the opening was very well received, especially our sound editing and use of filters.
After my own inspection of the piece, I found a few other minor issues, namely, the sound clipping at the end. The woman's voiceover is too loud, causing some distortion. This can be fixed in final cut very easily, so it is a change I will definitely make. It will, however, require balancing the music and sound effects as well. The distortion can be found around 2:00 minutes, on the lines "I'd just knock him out, and move in to the next one."
Secondly, the continuity error of the ransom message. The man states that they will meet at "midnight tonight" but when the detective is shown in the alleyway, it is very obviously broad daylight. We attempted to edit the footage to make it appear more like night time, but this negatively affected the quality of the video in other aspects, so we decided to leave it. Thankfully, it did not seem to be a major issue, as in the class feedback, no one mentioned it. Fixing this would require us either reshooting the alley scene or re-recording the voice over. It also seems unusual to have a kidnapper meet the detective in bright daylight, but this is too impractical to fix at this stage in the production.
We received some criticism concerning our mise-en-scene and time period. Supposedly, the costume and tape recorder were not from the same time period, however this is not something we can fix as we do not have more appropriate props available to us, and it would require reshooting, which we cannot do this late in production.
In our film opening, shortly after the blinking animation, I edited the footage to imitate someone's vision slowly focusing on an object, as it adds a sense of realism and helps reinforce the narrative.
I started by selecting the focus blur from the blur filters and applying it to the clip I then centred the effect so that the focus was on the actress' face. I preferred this to the other blur filters as it blurred more at the edges than the centre, which is more realistic. I set the time to the point where I want the transition between "out of focus" and "more focused" to begin.
I then adjusted the values for the focus blur to obscure the image more, to resemble a person's vision shortly after waking up. I then toggled keyframe animation for the "amount" and "softness" values (+ icons in the diamonds).
I then moved the timeline forward slightly and toggled the keyframes again, and adjusted the values. I did want to adjust the interpolation of the keyframes, but I could not find a way to do so in final cut pro. The result can be found at 2:13 in the opening. The effect ends up only being about a second long, but I think it adds a lot to the piece and makes the events clearer (makes it more obvious that he has been struck in the head). If I were to do it again, I would most likely make it longer.
I attempted the colour isolation technique again, despite my previous failure. This time I used a much simpler piece of footage, taken from our film noir opening. I decided I wanted the light from the tape recorder to remain green whilst the rest of the clip was in black and white.
At first it seemed to work very well after some adjustment to the "similarity" setting. The clip was in black and white and the entirety of the green light was in colour.
However, when I looked at this part of the clip, I noticed it had caused issues due to the similar colour values of the yellow curtains and the green light. I resolved this by using the blade tool to cut the clip and only apply the filter to the shots of the tape recorder. Here is the finished product.
Overall I think this was a helpful exercise, as I discovered that the color pass filter works in certain shots. With this knowledge I could use it sparingly in our finished piece. Typically, light coloured objects on dark backgrounds or vice versa work best.
During our filming, we had to make several changes. The reasons include not showing part of the location that was not appropriate for our setting and being unable to include any tilts due to the shaky camera. Some shots were added for the sake of continuity. Here is the revised storyboard.
I used the website CastingCallClub to post our project. Despite offering no payment, several people auditioned for the role. I cast one of them using the website, and uploaded the script, along with a message stating we may need additional lines at a later date.
All of the auditions, including the one that was cast, can be viewed on this page. The actress responded promptly with a recording, however this recording was too fast, so I sent her what we had of our film opening so far to help her get a better idea of what she should sound like.
As a group we edited in the kidnapper's voice over, which was voiced by Devin Mombourquette.
In this blog post I will detail how I edited the various sound effects such as tape recorder clicks and briefcase latches in to the video.
First I downloaded this clip . I dragged it from safari downloads in to final cut. I cut off the sound of the tape recorder stopping. I also copied the background noise of the tape recorder playing so I could have it play while the man was talking. I moved the sound of the tape recorder stopping to the end.
I then added a sound effect of a lighter being lit when the detective lights his cigarette. This is the video with the tape recorder section edited.
I edited in fade transitions for our production company openings by overlapping the clips and then applying a fade to colour transition. I also added in a fade in to the first shot. I added the title typography to the end of the opening. I did this by dragging the cross dissolve transition over the clips. I then double clicked them to open the close precision editor, shown below, to adjust the timings of the transition.
It was somewhat difficult as I had never used the close precision editor before but I was able to precisely edit the times of
For our film, we needed someone to voice our kidnapper's monologue. Mindi wrote a rough draft of it here:
My brother volunteered to record it. The voice actor had asked to take some artistic liberties. We agreed as a group that it was acceptable. We decided that anything was fine as long as it followed the general gist of "give us the money for the girl."
I asked him to try two slightly different accents. The first one sounds better and is most likely what we will use. I also posted it on various social media sites, open for strangers to try. Devin Mombourquette's was the one we chose to use:
For my practical task I investigated the use of cut outs and lighting. Often in film noir, cut outs are used to pool light on to a character's face or certain parts of it. This makes it more dramatic. It is an easy lighting technique that greatly increases the visual interest of a shot and creates more intense shadows. Here is an example.
I tried my best to recreate the effect with some paper, cardboard, and a lamp.
The first image is just a desk lamp aimed at this stuffed toy. The second is the same desk lamp shone through a thin paper cut out, and the third is shone through a cardboard cutout.
In the last two, the light pools on the head, as one would expect, however they are quite different. In the third one, more of the light is blocked out, creating a more dramatic effect. However, in the example, the use of this technique is very subtle, and I think the subtlety of the second one might work better, as unlike using a cut out to create the shadows of Venetian blinds the point of this is not to have crisp shadows, but to draw attention to a specific point on a character.
Sin City is one of few largely known, well received, contemporary examples of film noir movies, that very firmly sits within the film noir genre. For that reason I believe it will be a good example to deconstruct the characters of.
Marv:
Marv is one of the male protagonists of the movie, played by Mickey Rourke. He conforms to the following conventions:
Violent nature/history of violence: This character is often shown with some kind of injury and regularly threatens violence.
Code of honor: Despite his violent history and difficulty with people, he refuses to hurt innocent people or animals.
Vengeance: A common convention in film noir is the theme of revenge, justice or punishment. Marv strongly disagrees with harming women, and so deals with anyone guilty of these things with violence.
Dwight McCarthy:
Conventions that Dwight, another male protagonist in the movie, follows:
Private investigator: Detectives or private investigators are extremely common for male protagonists in film noir. It gives them a reason to analyse the plot, deconstructing it in their monologue for the viewer to understand better, but also a reason for them to investigate it.
Extremely cynical/nihilistic: Film noir movies are always set in dark, depressing settings. It could be argued that this is because it is reflective of the highly cynical, pessimistic worldview, but it could also be argued that the character is cynical and nihilistic because of the dark, depressing environment in which the narrative takes place. Regardless, Dwight fits in to this convention, often having a defeatist attitude or being completely unsurprised when something tragic happens.
Goldie and Wendy:
Goldie and Wendy, played by Jaime King, are two of female leads in the film. They conform to the following conventions:
Prostitute: Goldie and Wendy are prostitutes, and film noir plots often revolve around a woman, sex and lust.
Film noir often has a theme of "learning too much" or "ignorance is bliss"; characters often get into trouble or even die for learning too much about the wrong people, or intruding on matters that don't concern them. This is usually the male detective character, but can be others. In this instance it is Goldie, who dies after she learns another character's secret.
Femme Fatale: Goldie and Wendy are powerful women with a large section of the city under their control. This along with other aspects, such as their involvement with sex, and a tendency to wear red, make them Femme Fatale characters.
A contemporary example of film noir editing is Sin City. It is one of few modern movies within the film noir genre that fits the most obvious convention of being almost entirely monochrome. However, certain colours are not edited out, instead they are isolated on certain characters.
Here the red of the character's blood is isolated, but the red of the woman's lips is still edited out. This is likely because the male character is a main character.
This character's blue eyes are in colour, drawing the viewer's attention to them in particular rather than her face in general. This, combined with her expression, gives her a clear sense of vulnerability.
Key features are highlighted by isolating their colours. The use of this technique is actually very appropriate as in film noir movies and detective novels, characters are often referred to by their most notable features, such as blue eyes.
There is also the standard film noir black and white filter, where all the colours are removed. This is an obvious convention of film noir and serves several purposes, such as making the genre easily identifiable, being reminiscent of older movies of the genre, reflecting the time periods in which they are often set, and as a parallel to the themes of moral ambiguity or "moral grey" often included in these films.
Film noir movies also make use of heavy juxtaposition in editing. Cuts are not necessarily in chronological order, with flashbacks and frequent jump-cuts, making the plot maze-like and often difficult to follow.
In some more recent film noir movies, the use of colour isolation or colour splash effects can be seen. This is where the entire scene is in black and white minus a select colour or two. This colour is almost always red. I found several tutorials on how to do this in After Effects, but I decided to use one for Premiere as I am more familiar with this program. Tutorial here.
Unfortunately, this effect did not work very well. If I increase the colour tolerance, it just picks up the red values in Xena's hair instead of all of the red in the skirt. Though this is unsurprising for such a simple filter. I found an alternative method to create the effect in Premiere Pro here.
I started by applying a black and white filter, then an RGB curves filter, and then adjusting the master curve. This increases the contrast.
I then imported the video again on a new layer and applied a chroma key with the selected colour. This "removes" a specific colour. I then added an alpha adjust so that the opacity was inverted. It didn't work.
In short, this failed. I'm not sure if it was the video format or my editing, but it was completely unusable.
A common convention in film noir is to have characters smoking. We also planned, in the storyboard, to have a shot of the character lighting and smoking a cigarette. None of our actors smoke, however, and none of them understandably want to. We had an idea to use nicotine free shisha pens, but these do not look like typical 50's cigarettes, so I instead searched for a realistic looking movie cigarette and found this tutorial.
The tutorial essentially makes a real cigarette, but filling it with harmless parsley, whose smoke dissipates immediately and is harmless, instead of tobacco. It supposedly smells and tastes very bad though.
The cost of the filter tubes was about £5 for 200. I could not find any available in smaller quantities, but since the tutorial says these burn up very fast and we would require one per take, it is probably best to have enough for backups. I was able to buy 250g of parsley for £4. It's hard to say how many cigarettes this will make.
At first I added in way too much parsley, which resulted in the cigarette filter tube tearing open when I tried to fill it. I then didn't add enough, which meant it didn't look full and therefore not realistic. After some adjusting, I managed to get one that was full enough, and I folded the end.
It looks perfectly realistic, and lights up very well. I had my brother smoke one to get the photo.
This technique works extremely well, overall, the result is realistic and safe. On the other hand, it's very messy and smells very bad. The tutorial video did not exaggerate. Also, these cigarettes can only be used once per take and burn up very fast, meaning several would have to be made.
Dramatic lighting is vital in film noir. It usually features a single, harsh light, resulting in very solid black shadows. As the locations we are using are not actually appropriate for our setting, we have to light it very carefully and obscure as much of it as we can in shadows.
The first example is silhouette lighting, in which the harshest light source is on the opposite side of the subject to the camera, obscuring most of the features of the subject, but highlighting the shapes. It works especially well in film noir due to the lack of colour and high contrast, but is generally common across all crime fiction. This example is from "Catch Me If You Can". The lighting is reflective of the context of the scene, a dark conversation laden with threats.
This technique is sometimes called an eye-light. Flags are used to block the light in certain areas so that it only lights the brow and puts the highlights in the eyes. This is used to draw attention to a female character's face and eyes. It's an interesting technique.
This shot from "Hotel Noir" features a low hanging light, resulting in the radius of the light being very small and the light being very harsh. This also creates silhouettes of the protagonist and the railings.
In this shot, also from "Hotel Noir", the light is mostly from one side of the subject, obscuring half of his face. This is reflective of his intentions to steal money. The other side of his face being brightly lit could be associated with his hopes of starting a better life with it. It is an interesting case to light half the face instead of creating a silhouette of him. Its prevalence in film noir is most likely due to how good it looks in black and white and the idea of a good and bad side to everyone.


 I started by selecting the focus blur from the blur filters and applying it to the clip I then centred the effect so that the focus was on the actress' face. I preferred this to the other blur filters as it blurred more at the edges than the centre, which is more realistic. I set the time to the point where I want the transition between "out of focus" and "more focused" to begin.